If you use Microsoft Word in most of your documenting needs, it is only a matter of time before you create or get a document in Microsoft Word that needs to be signed. The good news is, you can add a digital signature in Word Document. MS Office does make the provision to add a digital signature to the document and improve its validity.
Part 1 How to Digitally Sign a Word Document
While it is possible to add a digital signature to a Word Document just for the purposes of authenticating them, there is also the provision to add a signature to make secure the document. This is particularly important if you need to secure an information-sensitive document. To protect the authenticity of the document, you can add an invisible digital signature to the document. The following is a simple way to do it.
- Step 1: Open the document you would like to sign in Microsoft Word and then click on the "File' tab.
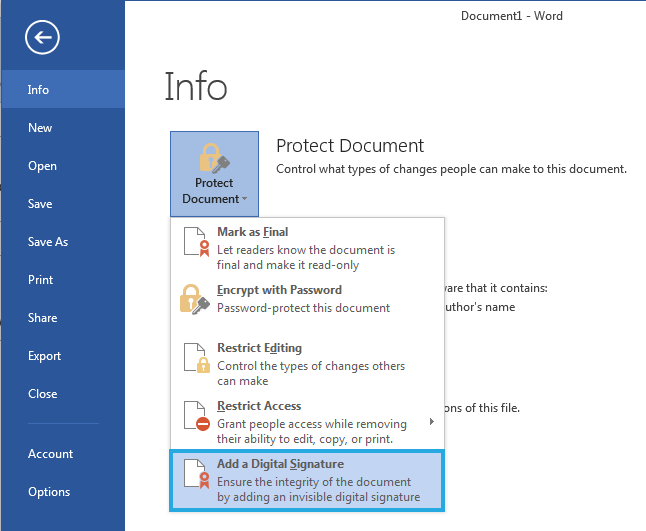
- Step 2: From the options under "File". click on "Info"..
- Step 3: Click on "Protect Document". and then select the "Add a Digital Signature". option.
- Step 4: Read the displayed message and then click "OK".
- Step 5: A "Sign". dialogue box will appear asking you to add a "Purpose for Signing this Purpose". and type the purpose.
- Step 6: Click "Sign". and the document will become read-only to prevent modifications.
Part 2 How to Insert a Digital Signature in Excel

You can also add a signature to an Excel worksheet for the purposes of authenticating the document or showing that it belongs to you or your company. The following is a simple way to add a digital signature to a Microsoft Excel Worksheet.
- Step 1: Assuming that you have already uploaded the digital signature, you will use to your computer, open the Excel Worksheet you want to sign.
- Step 2: Place the cursor in a blank cell near the location you want to place the digital signature.
- Step 3: Click "Insert > Signature line > Microsoft Office Signature Line".
- Step 4: If you see a warning message, click "OK". to remove it and open the "Signature Setup". dialogue box.
- Step 5: Type in your name in the box marked "Suggested Signer,". your email in the "Suggested Signer's email addresses". text box and your title in the "Suggested Signer's title". box. Click "OK". to close the dialogue box.
- Step 6: You should then see Excel add a line graphic next to the cell with the cursor. The line will also have your title and name under it.
- Step 7: Double-click on the line to open the "Get Digital ID". dialogue to select the ID type you want. Check, "Create your own Digital ID". Click "OK". and then enter your information before clicking "Create".
- Step 8: Next, click "Select Image". and upload your own signature image. Click "Sign". and your signature will now appear in the designated location on your document.