Begin able to make signature online will not only save your business valuable time and money but you will also be able to add a degree of professionalism to the way you deal with clients and other businesses. When you make a signature online as opposed to having to send out physical copies of the documents to be signed, you save time both for your business and the clients you deal with. Begin able to save them time makes them more than happy to want to do business with you in the future. If this sounds appealing to you and you want to learn how to make an online signature, this article will be of great help to you.
Part 1Ideal Software to Make Signature Online
To make a signature online, you will need the services of the best tool. There are very many available online but only one guarantees that you will be able to easily make the best online signature in the shortest time possible. That tool is Wondershare SignX and the following are just some of the reasons why it is the best tool for the job.
- The service is very easy to use and allows users to make an online signature in multiple ways very easily. Even if it is your first time making an online signature, you can't go wrong with SignX.
- All the signatures that you create and use are 100% legal and just as enforceable as the physical ones.
- Safety of the documents being signed is always a guarantee since the service utilizes only the best in SSL security protocols.
- You can easily designate exactly where you want the signers to sign the document with an easy drag and drop system.
- This service saves you a lot of money. There will be no spending on courier service to send documents for signing. Just add the recipients email address and they will receive the document.
Part 2How to Make Signature Online
Step 1: Make a Signature Online
Begin by creating an account with SignX if you don't already have one and then sign in to your account. Once signed in, click on "Create a Signature" located right next to your profile image.
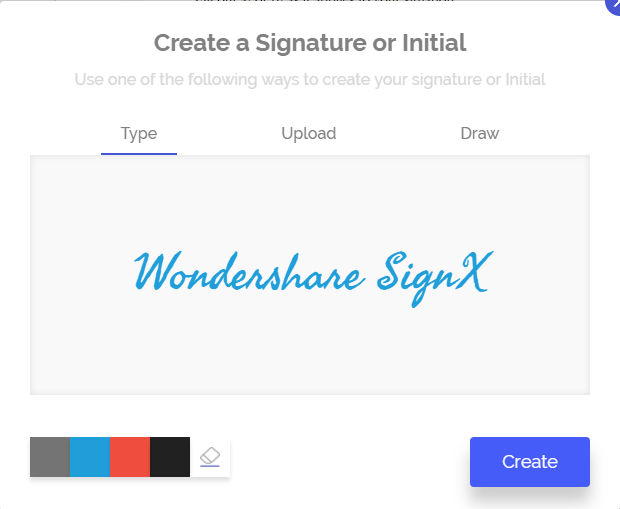
This will open a popup where you can create your signature in one of three ways; you can decide to draw, type or upload a pre-made signature. You can also change the colors on the signature created by clicking on the color options below or erase the signature by clicking on the "Eraser" icon next to the colors. When happy with the signature click "Create" to save it.
Step 2: Send for Signature
Now that you have a signature to use, click on "Send New Document" to send the document to the signers. Begin by uploading the document you want to send for signing. Simply click on the "Plus" sign to browse your computer for the PDF document. Once the document is uploaded, you can choose to add an access code to the document for added security and then click "Apply."
Enter the recipients email address and then click "Next" to edit the content of the email they will receive. Click "Next" and then accept the terms and conditions before sending the document for signing.
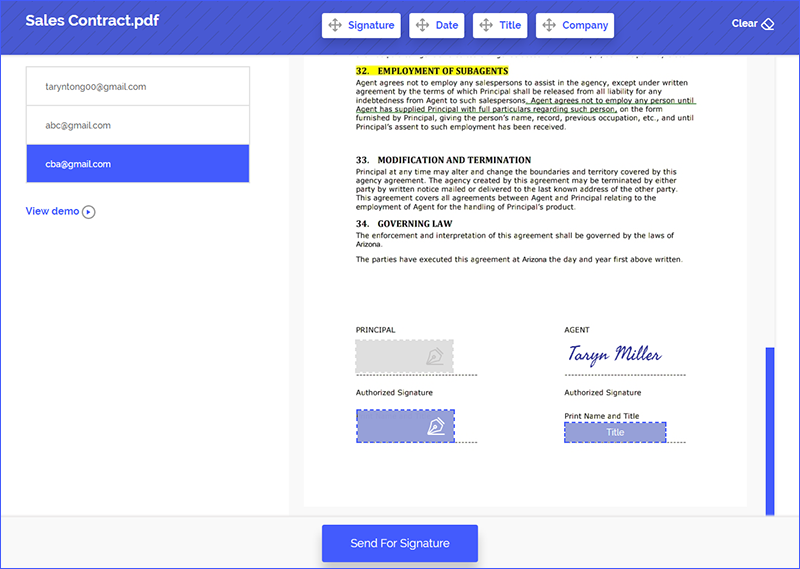
Click on the recipient's email and then drag and drop the "Signature" field to the location on the document where you want the signer to sign. Click "Send for Signature" to finish. If you used an access code, be sure to provide the recipients with the access code.
Step 3: Get Signature from Others
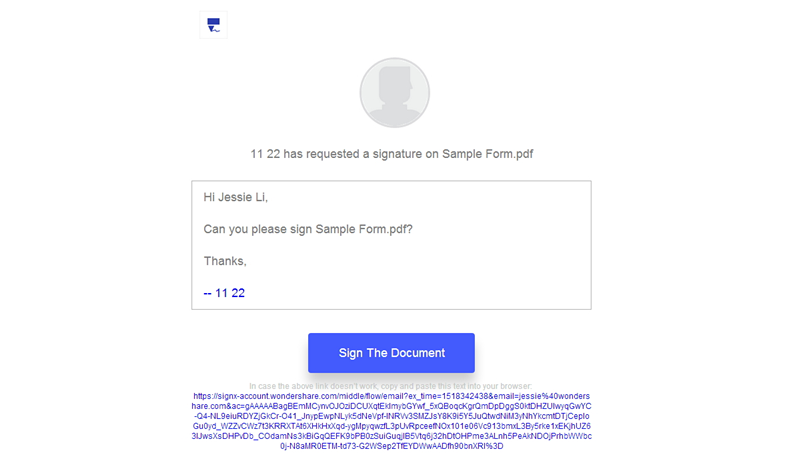
The document will be sent to the recipient's email address so that they will be able to see it and sign it.
When the document has been signed, it will appear as "Complete" on your dashboard. Click on the document to access it and you can then click on "Download" if you want to download it. You can also click on "People" tab to view who has signed the document.
Part 3Tips for Making Signature Online
The following are just some tips to make online signatures easier and much faster.
- It is essential to begin with a clear idea of what you want your signature to be before creating one. This way, you can just use SignX to type or draw the signature fairly quickly.
- Add a logo to the email you send out to the recipients. This adds credibility and professionalism to the whole process.
- You can also drag and drop other fields to the document being signed. You can add "Date" "Company" and others to the document. It also adds professionalism.
