Over the years, EchoSign support has received different complaints. Sometimes things do not work, and the support has to intervene and fix it. And thanks to their work, we've managed to gather the top 5 problems that EchoSign support faces on a regular basis. The product is now owned by Adobe, known as Adobe Sign, but some of the issues still exist. Hopefully, you'll find the answer to the issue you might be facing.
Part 1Fixes to EchoSign Issues without Contacting EchoSign Support
1. Email Address is already in use

Sometimes users of EchoSign use more than one Adobe product. And that is exactly the case here. If you've signed up for anything else at Adobe.com, your email is already in the system. And you cannot create a new EchoSign account with the same email.
The solution is to verify your email address. You do not need to create new or separate account. But you can verify your email. Click "verify my email", and an email will be sent with instructions to your email. Make sure to check junk and spam folders.
2. Server cannot be reached

Without an internet connection, you cannot work within EchoSign. That is why sometimes your connection might go down in the middle of the signing process. Especially if you are working on a Wi-Fi connection, you can experience interruption to the internet connection.
The best solution is to clear your browser cache, and check your connection. But most importantly, get your connection back.
3. Script is busy

This issue happens when you are emailed a document from EchoSign, but you cannot open it. When you try to open the document, the error "script is busy" appears. The problem might appear due to corrupt cookies or cache.
- Uninstall your EchoSign iPhone app
- Reboot your iPhone
- Install the app from the App Store
- Sign in using Adobe ID and the problem should be resolved.
4. Cannot login into the iPhone App

EchoSign also has an iPhone app, but users sometimes report issues that they cannot log into. If that is the reason, the solution, per EchoSign support is the following:
Your best solution is to flatten your PDF file. You can also use Print the document to a new PDF, same as with issue No.1. To do this, you need to open the document in Adobe Acrobat Professional, and go to File > Print. Select Adobe PDF as a printer. Then choose "shrink to printable area", click OK, and print the document to a new *.PDF file. You can also convert your document to static XFA. To do this, you need to use the application that first created your PDF document and save it in "Static XFA" instead of Active XFA.
5. Can't Sign Adobe PDF
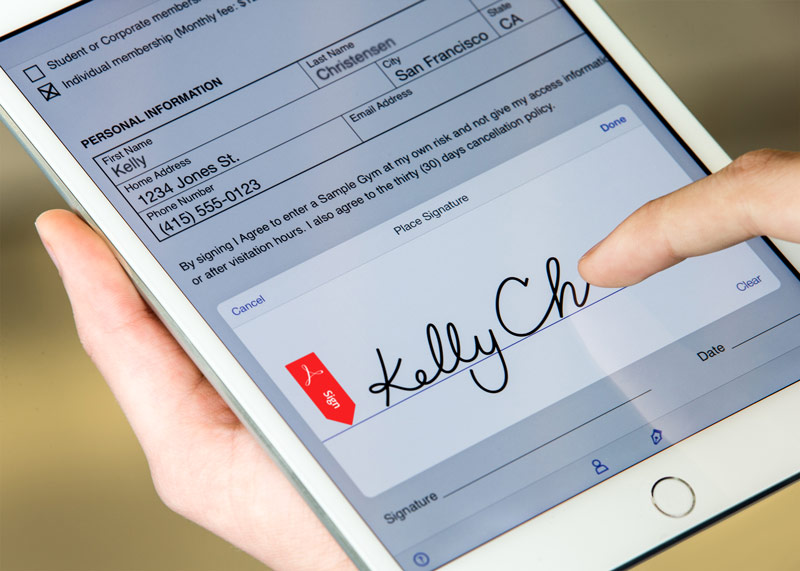
Sometimes, you might receive a PDF document you need to sign, but you just cannot find a way you cannot sign the PDF document. One of the possible reasons is that the document was not saved correctly in the first place. And you need to save the document.
For those operating in Adobe Professional, go to Advanced > Enable Usage Rights in Adobe Reader, and then you'll see a dialog box pop-up. You need to click "Save now".
If you are using Adobe Pro 9 or higher, go to Advanced > Enable Usage Rights in Adobe Reader, and click "Save now" once the dialog box pops up.
Users with Adobe Acrobat Professional X, just click "Save as" and then choose Reader Extended PDF. This will enable users to sign the document using Adobe Sign.
Part 2The Best Solution to EchoSign
If you are fed up with all the problems and issues Adobe has, you can always change the software. If that is your solution, then the best product on the market is Wondershare SignX. Unlike Adobe Sign, it comes with much cheaper price tag, and with much more features in the same time. Here are some:
- Multiplatform support allowing you to sign documents from your mobile phone, tablet, or computer
- All documents are legally binding
- Sign the document from anytime, as long as you have access to the internet
- Centralized dashboard with detailed audit trail to track the entire process
- Two-factor security authentication ensuring your documents is always safe and secure
- Multiple users can share a single SignX account

Step 1: Upload PDF
Start by logging into your SignX account, and then click "Send New Document". The software will ask you to upload a document, and you can do that by clicking "+" to upload a PDF file. Locate the document and add it.
Step 2: Sign PDF by Yourself
Once you've added the document you want signed, click "Next", and you'll be asked to enter recipients. Just below the box for emails, you'll see a box "I need to sign the document". Check this box, and choose whether you want to sign first, or last. Click on "Next" twice.
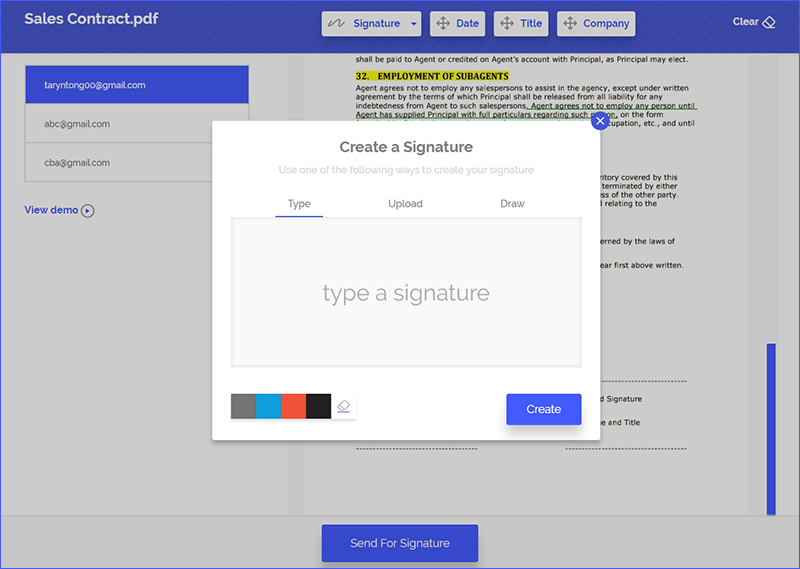
In this Window, you can sign the PDF by yourself. Click on the "Signature" and drag and drop your signature into the PDF. If you haven't created already, you'll need to click "Signature" > "New Signature" to create a signature by "Drag", "Type", or "Upload". Create your signature and add it to the PDF.
Step 3: Send for Signature
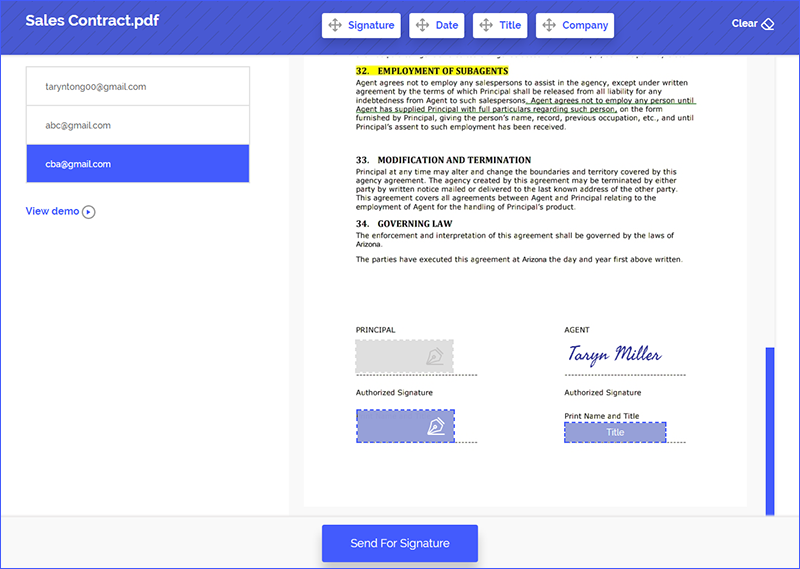
On the last step, you'll need to add fields for others to sign. Click on recipients' email address. You can add signature fields for name, title, date, and company. Just click on the related button and drag and drop it to the PDF file.
After adding fields on the pages you need signing, and then click "Send for Signature". After you send the document, you can track the entire process in the centralized dashboard.

