There is an increasing demand of PDF documents that need to be signed, and keeping the overall digital ecosystem, the signatures also need to be electronic. This also puts pressure on the signatures to be as authentic and legally binding as the ink ones. So signing Adobe PDF documents should be signed using industry-grade e-signature software that provide legally binding signatures and is reliable in every regard. We will cover the leading software used for signing Adobe PDF documents. Towards the end, we will give you a step-by-step guide on how to sign Adobe PDF and make sure you begin signing your documents, absolutely free of any hassle.
Part 1The Ideal Tool to Sign Adobe PDF
Wondershare SignX is the only resource you will ever need to sign Adobe PDF documents. This tool is filled with countless features that will make your e-signing journey a breeze, and even a task that you will look forward to. You can sign Adobe PDF with legality and signature from others fast.
In addition to that, you can send them to other parties and track the documents. You can also encrypt them, save it on the cloud and sign them on the go with their iOS and Android apps. It gives you state of the art, cutting-edge fast e-sign solution to sign Adobe PDF documents without any worries. It is very cost-effective, secure and 100% legally-binging in most countries around the world. It is a comprehensive solution for all your e-signing needs.
Part 2 How to Sign an Adobe PDF
1. Upload Adobe PDF
The first step towards using SignX to sign Adobe PDF documents is signing up on SignX. You can do that by going to the Wondershare SignX and entering the necessary information like your name, email and password. After entering these details, hit the "Sign Up" button and an activation email will be sent to your email address. Activate your account using that link and proceed to the next step.
After you have activated your account, Log in using your email and password. Click the "Send New Document" button, and then proceed to click the "+" sign to attach the Adobe PDF document you need to sign. Once you have uploaded the document, you can view and modify according to your needs.
2. Add Recipients
Click the "NEXT" button, it will display your first page of Adobe PDF document where you can add an access code which you will use to restrict access your document, in case you send it to recipients. Click "Next".
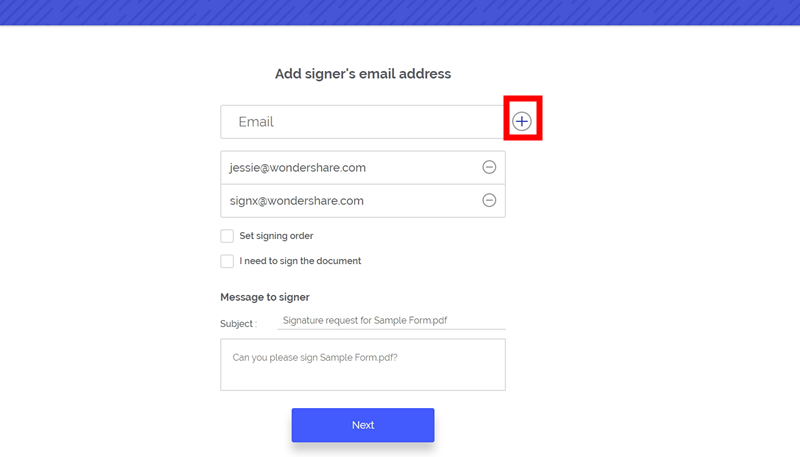
In this step you will enter the email addresses of the signers that need to sign your Adobe PDF document. Keep adding the email address using the plus mailbox icon. Check the "I need to sign the document" checkbox and select the Sign first or Sign Last option if you want to sign in first or lastly, respectively. Then click "Next".
Here you can customize your personal email message which the recipient will see upon receiving the email. Read and agree to the terms of use and click "Next".
3. Sign Adobe PDF by Yourself (Optional)
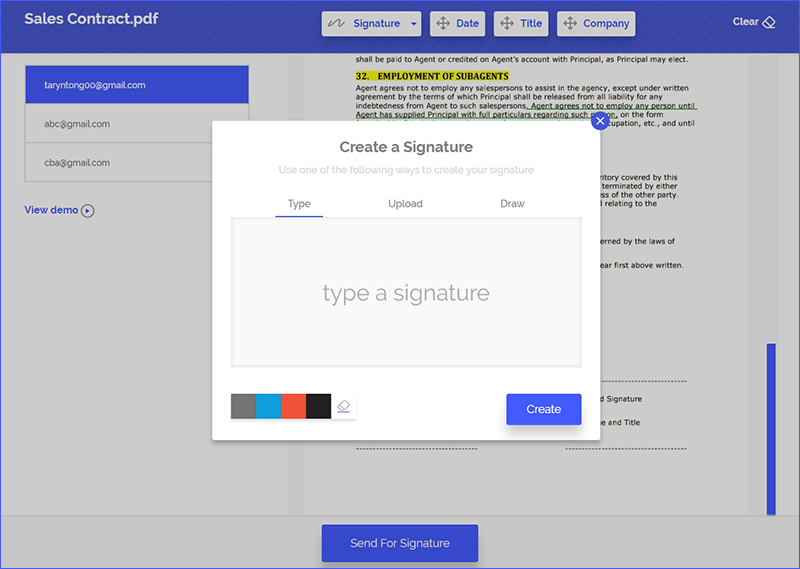
If you are the first one to sign the signature, upon clicking the "Signature" field, a drop down menu will show "New Signature", click it. Upon clicking it, you will be provided with three options to sign your document. You can either Draw your signature or Upload a picture with your sign. You can also type your name and it will produce an artsy signature for you. Click the "Create" button to finalize the signature and add it to your document.
4. Set Fields for Others and Send for Signature
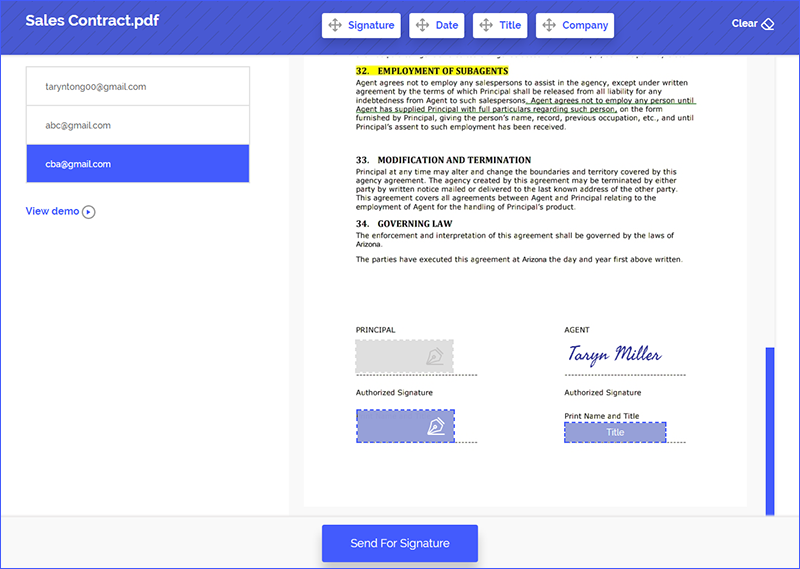
In this step you will add fields on your Adobe PDF in accordance with your recipient emails. With each email address, add the fields on the document in the right pane like Date, Title, Company, and of course, a Sign field.
After adding fields, click the "Send for Signature" button to send the document to recipient parties for their signatures. Once you have sent it, you can track the progress on your mobile device or your web browser.
Part 3Tips for Singing Adobe PDF
- Signing your Adobe PDF documents is quite an easy task. Once you get the hang of it, your work life will be a lot easier and you will be able to complete most of your documents related tasks in minutes. There are some tips you should use in order to optimize your work. Following is what you should keep in mind:
- Keep the Signing fields clearly visible
- Signing field should be large enough to accommodate most signatures
- If you restrict your document with access code, write it down with you and send it along with the document to avoid confusion.
- Keep your documents backed up to cloud so you can access them everywhere.

