People are moving on to paperless environments in most organizations because of its increased productivity, efficiency and environmental-friendly advantages. There are numerous software and websites that allow you to electronically sign documents online. These applications allow you to sign the documents and also have them signed from different parties – all from the comfort of your home. To Sign documents online free requires little to no effort and is a reliable and amazingly swift way to get work done. We will show you how to sign pdf documents online which will undoubtedly make your work-life hassle-free. Learning how to sign documents online will save you countless hours and will allow you to focus on more important work.
Part 1 The Best Tool to Sign Documents Online
To easily sign documents online, you first need a tool that lets you sign your documents absolutely seamlessly. Only then will you be able to do it flawlessly and increase your productivity manifolds. Wondershare SignX lets you do exactly that. It is a online document signature, and makes your electronically signing a breeze and boosts your productivity to new levels. Its fast e-sign platform lets you sign your documents quickly and also offers you the following:
- Legality: It offers as legally binding and complacent signatures as hand-written ones and they are accepted worldwide.
- Safety: It takes extra measures to ensure your documents are 100% encrypted and safe with their robust and ultra-secure data centers.
- Cost-effectiveness: SignX is the most affordable and intuitive electronic signature solution for small & mid-sized businesses, as well as for personal use. It has five sends for free.
- Simplified Document Management: It allows you to manage your document with much ease. It allows you to track your documents for approval and monitor them remotely.
- Seamless Document Editing: With a swift document editor, you can modify your documents on the go and sign them when needed.
- Real Time Notifications: Get notifications in real-time and alerts whenever your document is opened, read or signed.
- Audit Trails: It keeps track of senders' email address, timestamps, and IP addresses to improve traceability of signature requests.
- In the Clouds: You can access, edit and sign your documents from wherever you want.
- Centralized Dashboard: It gives you a dashboard that shows you all your documents, that need to be signed and approved.
- Multiple users management: You can add or remove different users in your account.
Part 2 How to Sign a Document Online
Let's get you started on the whole e-signing goodness! Once you are logged in, signing the documents and sending them to get signed by others is a piece of cake. Follow here:
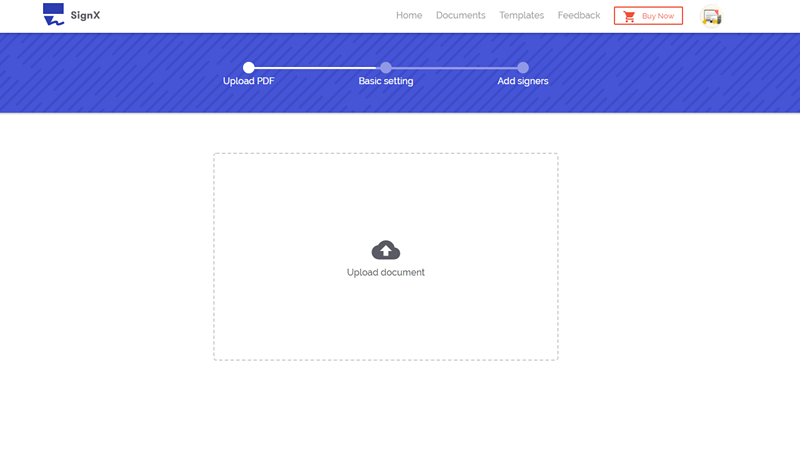
Step 1: Upload Document
Once you're logged in, click the "Send New Document" button. Click the visible "+" button to add new document that you want to sign. It will load your document and then show it to you on the website so you can proceed.

Step 2: Set Access Code
Clicking the "Next" button will take you to the first page of your document. For security purposes, you can add an access code on this page so whenever someone opens it, they are required to give that access code.
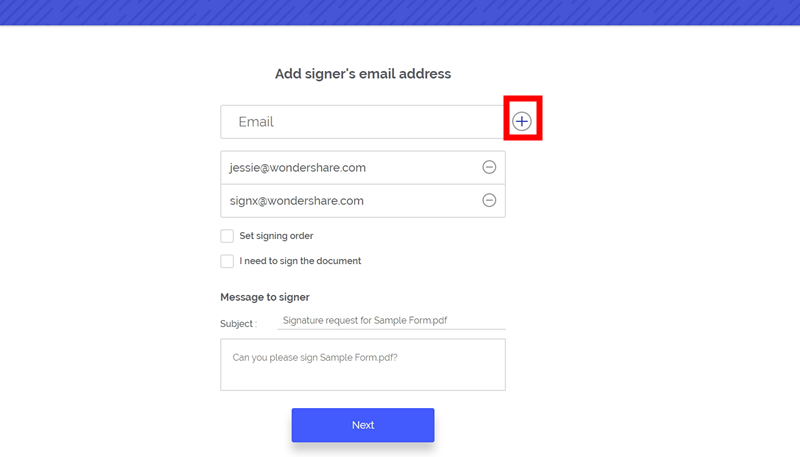
Step 3: Add Recipients' Email
Click "Next" and it will take you to the next page where you add the recipients' email addresses who need to sign it. Check the "I need to sign the document" checkbox and select the option of Sign First or Sign Last. The order of the email addresses is the order in which your recipients will sign the document. You can change this order by dragging and dropping email addresses up and down. Once you’re done with this step, click "Next".
Now you will be able to customize your email message. Click "Next" and then check the "Terms of use Electronic Records and Signature Disclosure" and also choose the option of "I agree to use Electronic Records and Signature Disclosure". Now hit "CONTINUE".
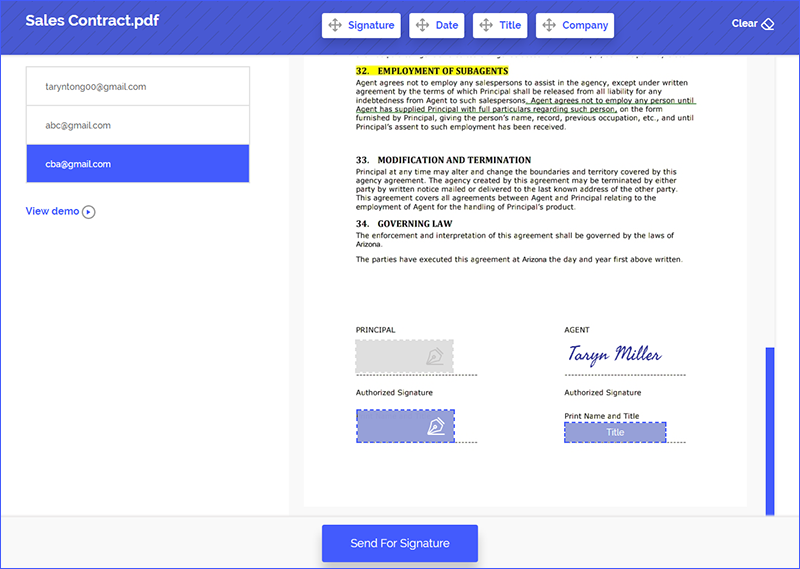
Step 4: Set Fields for Signature
On this page you will see recipient email addresses on the left. The first one is highlighted blue. This means that you are setting the field for this email address. Set the field for where this person needs to sign and click the next recipient to select the field for the successive email addresses.
Select the "Signature", "Date", "Company" and "Title" fields from the fields tab on the tap and place it where you want them on the page. The fields are movable by using the four-direction arrow and they can also be deleted using the small "x" sign. If you want to delete all fields on the page, hit "Clear" button on top right corner.
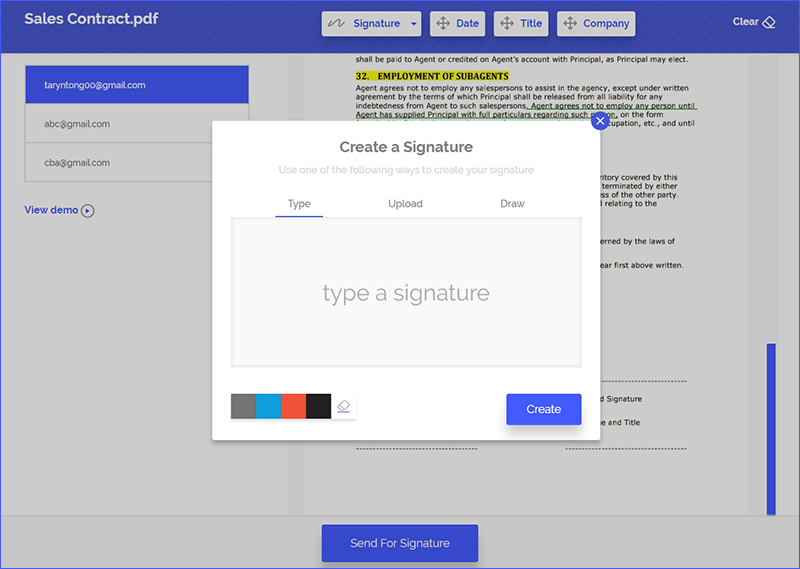
Step 5: Sign Documents by Yourself (Optional)
If you are the first one to sign the document, when you click the Signature field from the tab, there is an option to create a new signature. Follow any of these ways to create your first signature.
- Draw: Use your mouse to draw your signature. You can erase or change the color if necessary.
- Type: Type your name and SignX will automatically convert it into an art signature.
- Upload: Click "Select Your Signature" and then Browse the image file from your computer and add it. Then move the blue box on the image to select your signature in the image.
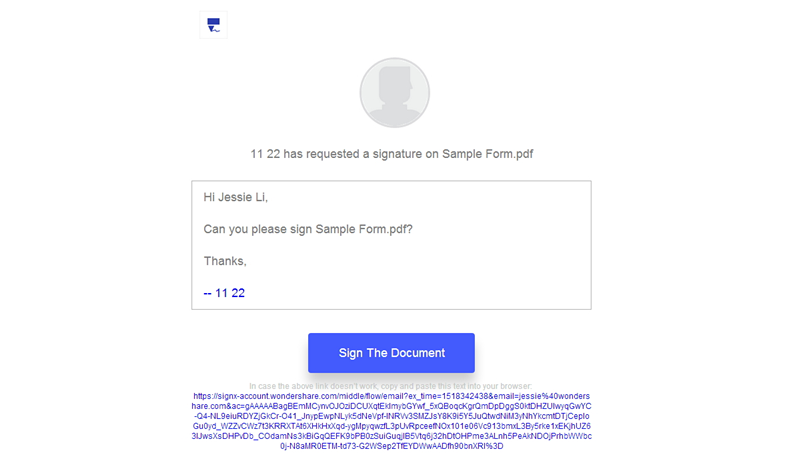
Step 6: Send for Signature
After you've set fields for signature, just click "Send for Signature". The recipients will receive the email and they can sign the document by clicking "Sign The Document".


